Video ID: 181015
How to Install a Stock Levolor Cordless Cellular Shade
Introduction
This guide covers how to measure for, unpackage, and install a Levolor brand cordless cellular, honeycomb, or pleated shade purchased from a home improvement store.
Tools Needed

Scissors
Flat Head Screwdriver
Drill with a Phillips Bit
Drill Bit Set
Tape Measure
Pencil
Parts Needed

None
Step 1 – Order and purchase the correct size shade.


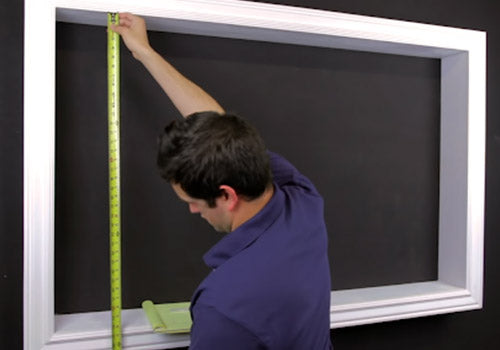
- First measure the width of the window frame in three places: the top, middle, and bottom.
- Take the smallest of these three measurements and round down to the nearest ⅛”.
- Then measure for the height of the window frame in three places: the left side, middle, and right side.
- Take the largest of these three measurements and round up to the nearest ⅛”.
Step 2 – Order and purchase the correct size shade.
Step 3 – Remove the new shade and hardware from the box.


Step 4 – Install the top and bottom rail end caps on both sides of the shade.


Step 5 – Mark pilot holes for mounting brackets.
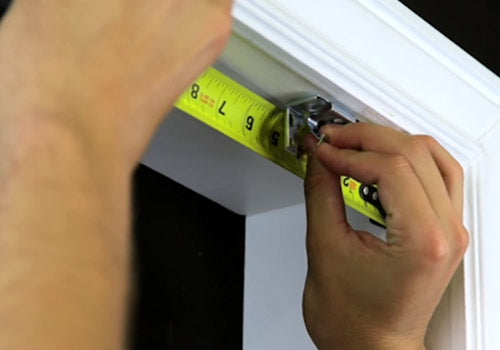


- Brackets are typically installed a few inches from either end and then every two to three feet. If you just have one center bracket, measure to ensure even spacing.
- With the brackets in their desired positions, mark for pilot holes with a pencil.
- Drill pilot holes with a bit that is slightly smaller than the screws.
Step 6 – Mount the brackets.


Step 7 – Mount the shade, and test the operation.


