Video ID: 381009
How to Replace Bali and Graber Vertical Blind Stems and Gears in G98 Headrails
Introduction
This guide demonstrates how to replace the stem and gear on Bali Magnum and Graber G-98 Ultra-Vue vertical blind headrails. First, we’ll walk through replacing the stem and gear on a standard carrier. You can do these repairs with the blind hanging. Then, we’ll tackle the more complicated stem and gear replacement on the master carrier. For repairs to the master carrier, the blind will need to come out of the window.
Tools Needed

Tools Needed if Working on the Master Carrier
 Needle Nose Pliers
Regular (Slip Joint) Pliers
Phillips Screwdriver
Work Gloves
Needle Nose Pliers
Regular (Slip Joint) Pliers
Phillips Screwdriver
Work Gloves
Parts Needed


Parts Needed if Working on the Master Carrier


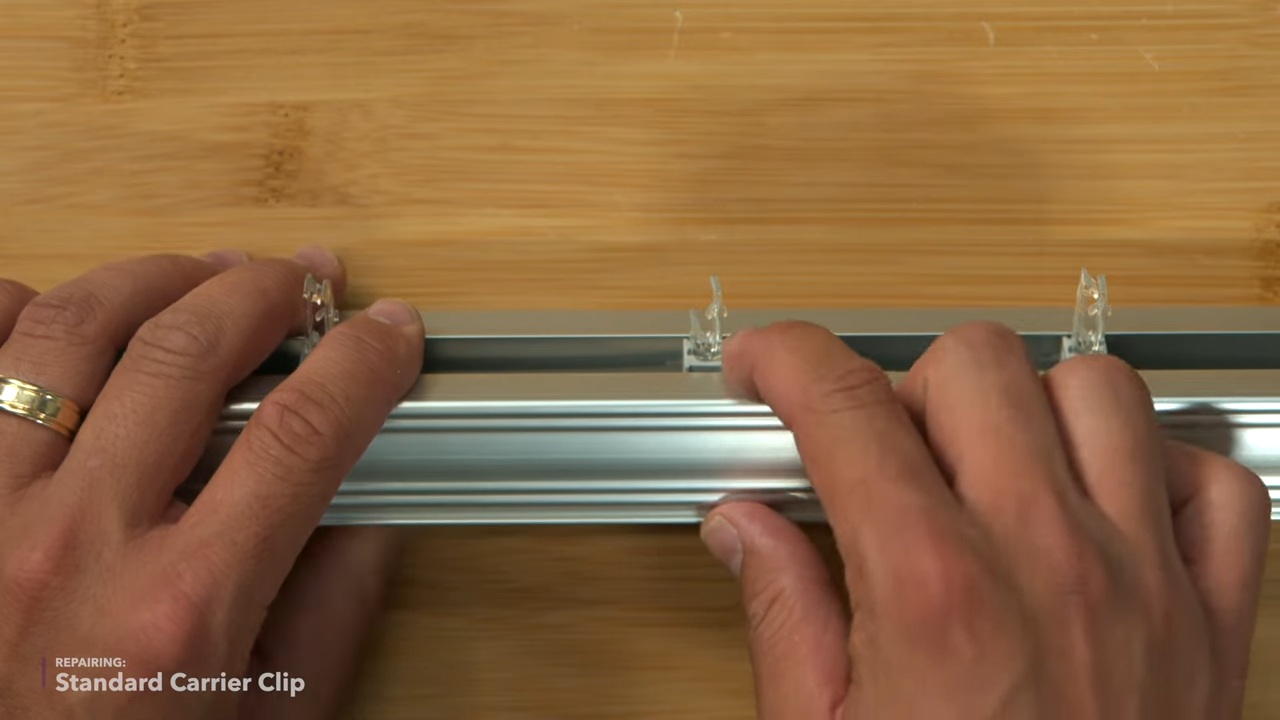
Step 1– First, let’s look at how the stem and gear fit together. There are two small tabs on the end of the clip that have to be compressed to separate it from the gear. Special pliers must be used.


Step 2 - Now, we’ll replace a stem on a standard carrier. Make sure that the stems are perpendicular to the headrail so that you can access the tabs on the stem. Use the pliers to firmly squeeze the tabs on the end of the stem. Set the pliers down and pull the stem free from the carrier. This repair can be done with the blind hanging in the window if you prefer.


Step 3 - To remove the gear, just push it out of the side of the carrier. If the blinds are hanging up, be sure that the small gear doesn’t fall down in the heat register.


Step 4 - Slide a new gear into the carrier. There are two different sides to the gear. The flat side goes toward the floor when the blinds are hanging.


Step 5 - Insert a new clip into the gear and carrier. The nub needs to face the same direction as the others. The small notch needs to fit into the gear properly.


Step 6 - If the new stem isn’t lined up perfectly with the others, that’s OK. These blinds are self-aligning and can correct themselves. To get the blinds to self-align, twist the wand all of the way in one direction and then all the way to the other direction. This will align the stems.


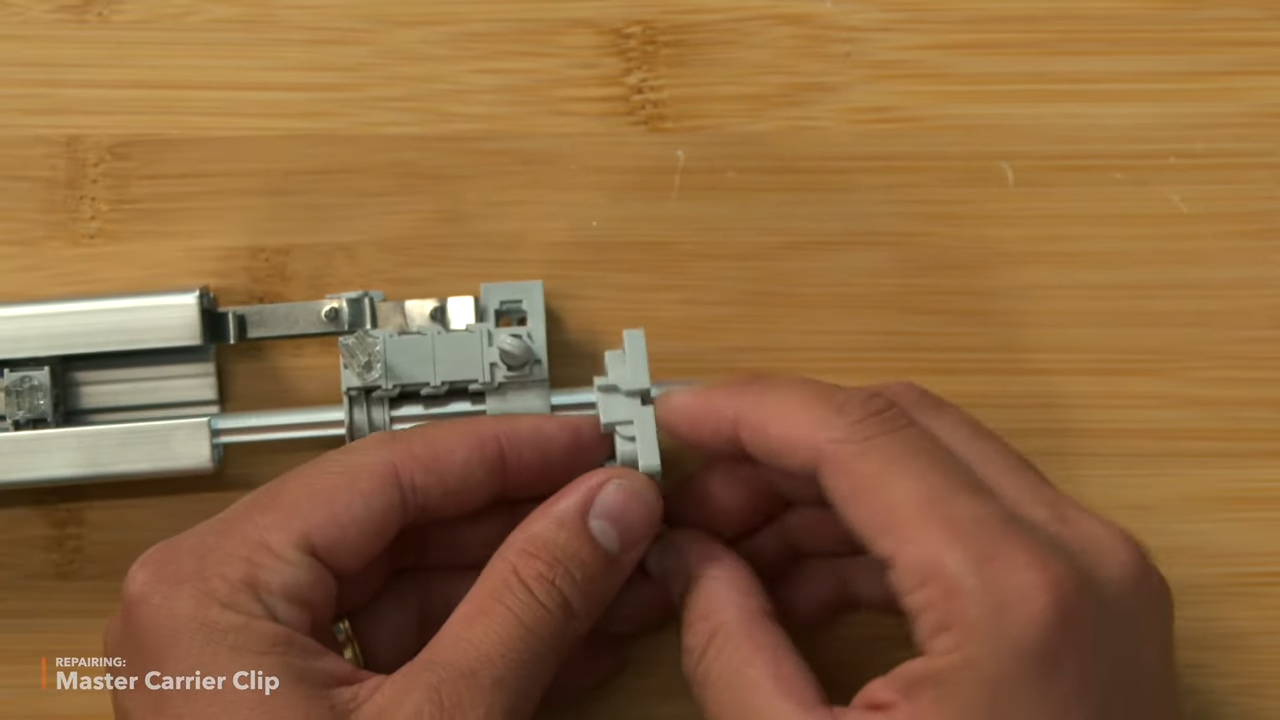
Step 7 - To replace the stem or gear on the master carrier, the whole tilt control must be replaced. We recommend removing the blind from the window for this repair. To begin, remove the wand from the tilt control, and set it aside to reuse. Use needle-nose pliers to separate the metal ring the wand is attached with.


Step 8 - Remove the small screws from both ends of the headrail.


Step 9 - Remove the end caps from both ends of the headrail. The headrails can be sharp and we recommend wearing work gloves to protect your hands from cuts.


Step 10 - Push all of the carriers down toward the end with the wand control until the train starts to come out of the headrail. Now, use needle-nose pliers to remove the push nut retainer from the end of the tilt rod on the side by the tilt control mechanism. Remove the plastic idle end piece.


Step 11 - To remove the tilt control, compress the small metal notch that is sticking up. Now, the tilt control will slide off of the tilt rod.


Step 12 - Put the new tilt control assembly onto the tilt rod. Be sure to line up the notch in the tilt control with the notch on the tilt rod.


Step 13 - Insert the metal spacer strip into the slot on the tilt control. Use the needle-nose pliers to rebend the tab.


Step 14 - Put the idle end back on with the V-shape facing the top of the blinds.


Step 15 - Put a new push nut rod retainer onto the tilt rod. Make note of where the old one was and put the new one in the same position. Use needle-nose pliers to work the new push nut into position if you don’t have a nut driver tool.


Step 16 - Slide all of the carriers and tilt control back into the headrail. Be careful that the spacer straps don’t get caught.


Step 17 - Slide the idle end back to the end of the headrail, and reattach both of the end caps. Remember to use a glove to protect your hand from the potentially sharp edges of the headrail.


Step 18 - Reattach the wand. Put the metal ring through the eyelet on the tilt mechanism. Hold the ring with pliers and insert the wand on it. Squeeze the ring closed with the pliers.


Step 19 - Let’s get the new stem to face the same direction as all of the others. To get the blinds to self-align, twist the wand all of the way in one direction and then all the way to the other direction. This will align the stems. Then, slide the carriers across the headrail with the wand to make sure everything is operating properly.


Step 20 - Reinstall the screws into each end cap of the headrail.

