Video ID: 401031
How to Replace a Cord Loop Tilt Mechanism with a Wand Tilt Mechanism on a Horizontal Blind
Introduction
Cord loop tilt mechanisms were sometimes used on horizontal wood, faux wood, and Venetian blinds in the past to tilt slats open and closed. Cord loops on blinds are a safety hazard with children and pets. These loops cannot be held down with a tension device, and free-hanging loops pose a strangulation risk to children. Replacing a cord loop tilt mechanism with a wand tilter eliminates the dangerous loop. Switching to a wand tilt mechanism is an easy and economical way to make your window coverings safer for children and pets.
A Note on Safety
Kids can strangle in blind cords. To make your blinds safer for kids, keep cords out of reach and secure cord and bead chain loops. To learn more, please visit our child safety guide.
Tools Needed

Flat Head Screwdriver
Needle Nose Pliers


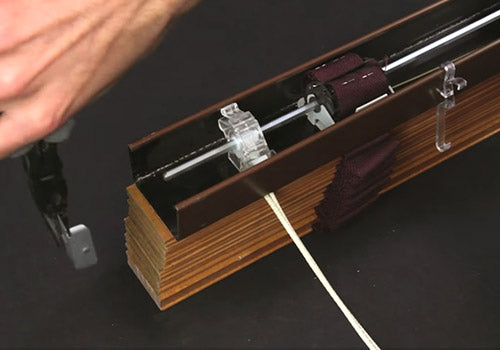
Step 1 – Remove the blind from the window.

- Use a flat head screwdriver to release the latches on the brackets.
- Set the blind on a flat work surface.
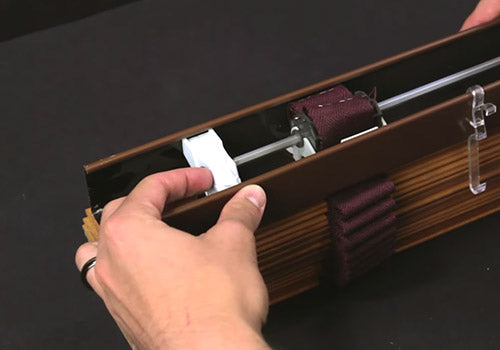
Step 2 – Remove the end stiffeners from both ends of the headrail.


- Use the needle nose pliers to remove the stiffeners.
- Some blinds may not have end stiffeners.
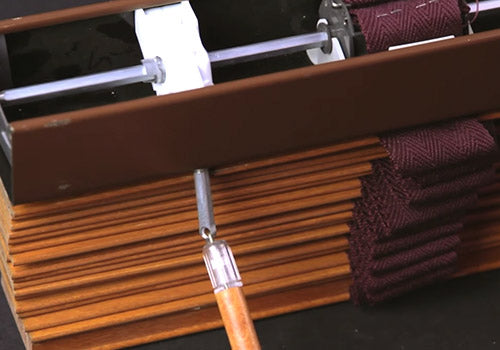
Step 3 – Slide the tilt rod out of the tilt mechanism.


- It’s only necessary to slide the tilt rod out just past the tilt mechanism. Do not remove it completely from the blind.
Step 4 – Remove the cord loop tilt mechanism from the headrail.


- Use a twisting motion to release the mechanism from the headrail.
- It’s helpful to slightly widen the top rail by hand near the tilt mechanism prior to removal.
Step 5 – Insert the wand tilt mechanism into the top rail.


- The front bottom portion and the rear top portion of the wand tilt mechanism should fit securely in place.
Step 6 – Slide the tilt rod through the mechanism.


- Align the tilt rod with the hole in the tilt mechanism.
Step 7 – Replace the end stiffeners on both ends of the blind.


- It might be necessary to squeeze the sides of the top rail to reinstall the end stiffeners.
Step 8 – Attach the new tilt wand.


- Slide the cap of the wand tip onto the tilt mechanism’s shaft.
- Connect the hook to the eyelet on the tilt mechanism.
- Slide the cap down over the hook to secure the wand in place.
- How the wand attaches to the tilt mechanism will vary depending on the style of wand tilter and wand used.
Step 9 – Test your repair.


- Twist the wand to make sure the tilt mechanism is turning the tilt rod.
- If the tilt mechanism is rotating the tilt rod and other tilting components properly, the repair is complete.