Video ID: 401037
How to Restring a Horizontal Blind with Looping Lift Cords
Introduction
Some horizontal blinds operate using looping lifting strings. That means that the strings go around a pulley wheel in the bottom rail and pass through the slats on the blinds twice. The type of operation is different than standard lift horizontal blinds and use a different part, and have different steps when restringing. These instructions will explain exactly how to complete this repair.
A Note on Safety
Kids can strangle in blind cords. To make your blinds safer for kids, keep cords out of reach and secure cord and bead chain loops. To learn more, please visit our child safety guide.
Tools Needed

Scissors

Pliers

Tape Measure

Lighter
Parts Needed
Step 1 – Determine the length of each string needed. The width of the blind, plus three times the length of the blind will give you the length needed for each lifting string.

- Make sure to measure the amount for each string.
- Cut the strings needed for repair.
Step 2 – The first restring instructions will cover a blind whose string is intact or frayed. Skip to step 12 if the string on your blind is broken or missing.

Step 3 – Remove the valance, wand, and tassels.

- Set aside these parts for reuse.
Step 4 – Raise and remove the blind from the window.

- Set the blind on a flat clean work surface.
Step 5 – Unlock the cord slightly to loosen the lift strings.

Step 6 – Locate where the lift strings are tied off in the headrail. Using pliers, pull the strings out a few inches out of the headrail and cut off the knot.

Step 7 – Using a lighter, join the ends of one of the new strings to the old string where you just cut off the knot. Repeat for each lifting string on the blind.

- Use your fingers to roll the strings together to create a weld.
- Fuse the strings together carefully as the strings will be hot.
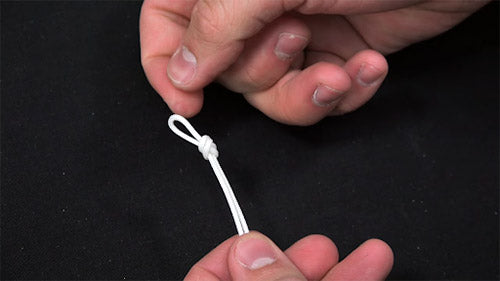
Step 8 – Tie a knot at the end of each new string.

Step 9 – Rehang and lower the blind.

Step 10 – Carefully pull the string through until the new string is seated inside of the headrail. Pull on the lifting strings as you do to lift the blinds up normally.

- You may need to tuck the knots inside of the headrail.
Step 11 – The second restring instructions will cover a blind whose strings are broken and/or missing.

Step 12 – Raise and remove the blind from the window, and set it on a clean flat work surface.

Step 13 – Remove the remainder of the old string from the blind.

Step 14 – With a lighter, blunt the end of a new string to prevent fraying.

Step 15 – Thread the string through the hole on the underside of the headrail.

- You may need to remove the tilt rod and drum to find the string.
Step 16 – Thread the string through the side of the cradle, and tie a double knot. Repeat for each lift string you’re replacing.

Step 17 – Rehang and lower the blind.

Step 18 – With a lighter blunt the other end of each new string to prevent fraying.

Step 19 – Starting at the top slat, thread the string down through the slats. Make sure to alternate sides of each ladder string support.

- Alternating the strings ensures that the blind slats don’t shift during operation.
Step 20 – Thread the string down through the bottom rail button on the backside of the pulley, then back up the front side of the pulley.

- Alternating the strings ensures that the blind slats don’t shift during operation.
Step 21 – Thread the string up through the slats.

- Make sure that the lift string is on the same side of the ladder support going both up and down the blind.
Step 22 – Raise and remove the blind from the window. Set it back on your work surface.

- When raising the blind, make sure the new lift cords do not become tangled or pulled out from the blind.
Step 23 – Trim the end of each new string and blunt them with a lighter.

Step 24 – Thread each string through the bottom of the headrail, through the immediate cradle, and in front of all other cradles.

- You may have to move the tilt rod and drum to find and guide the strings.
Step 25 – Thread each string down through the cord lock.

- Make sure when threading the cord lock that the latch is positioned correctly for proper operation.
Step 26 – Make sure the tilt rod is seated properly inside the headrail.

Step 27 – Rehang the blind.

Step 28 – Test the lifting, lowering, and locking functions of the blind.

Step 29 – With the blind covering the window, cut off the strings evenly, and attach the tassels.

Step 30 – Attach safety washers to each lift string within 3 inches of the cord lock.

Step 31 – Attach the wand and the valance.


