Video ID: 101005
How to Restring a Horizontal Wood Blind
Introduction
Sometimes the string on wood blinds can break or become frayed. It is necessary to replace the string on the blinds when this happens. These instructions will show how to restring a standard lift horizontal wood, faux wood, or Venetian blind. The basic principles in this guide will also apply to mini blinds.
A Note on Safety
Kids can strangle in blind cords. To make your blinds safer for kids, keep cords out of reach and secure cord and bead chain loops. To learn more, please visit our child safety guide.
Tools Needed

Scissors

Flathead screwdriver

Pliers

Tape measure

Lighter
Parts Needed
Step 1 – Twist the valance clip into the slot on the back of the valance.

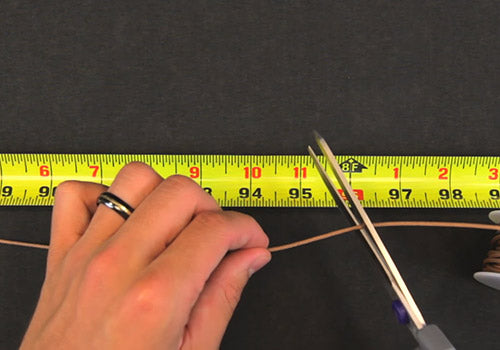
Step 2 – Determine the length of string needed.

- Measure the length and width of the blind.
- Determine the number of lift strings in the blind.
- Use the following formula to determine the amount of string needed.
[(2 x length) +width] x number of lift strings
- We recommend replacing all of the lift strings on the blind to ensure proper operation.
Step 3 – Cut all of the pieces of new lift string to the necessary length.

*** If the string in your blind is still intact or slightly frayed, follow steps four through nine. If the string on your blind is completely missing or removed from the blind, skip ahead to step ten. ***
Step 4 – Cut the knot off the string in the bottom rail.

- Remove the bottom rail buttons from the bottom rail.
- Cut the knot off the string that is under the button.
Step 5 – Fuse the new string to the existing string.

- Fuse the ends of one of the new strings to the end of an old string with a lighter.
- Once both of the ends have slightly melted, roll the strings together with your fingers to weld them together.
- You may want to wet your fingers before rolling the string, as the melted string will be hot. Be careful not to burn yourself.
Step 6 – Pull the string through the blind.

- Pulling on the external lifting cords, pull the new string through the blind until the new string comes out of the blind and is at the desired length.
Step 7 – Tie off the new string in the bottom rail.

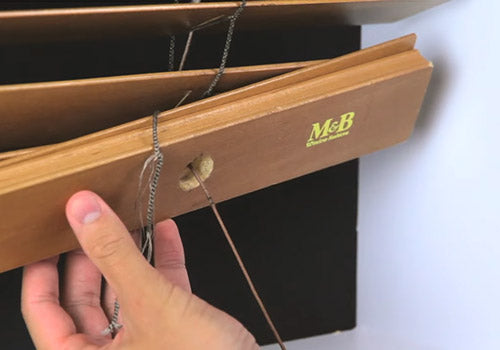
- Tie a double knot on the bottom of the new string, and push it into the hole in the bottom rail.
- Re-insert the string ladders into the hole.
- Replace the bottom rail button.
Step 8 – Repeat steps four through seven for each lift string being replaced this way.

Step 9 – Finish the repair.

- Cut the old string off.
- Remove any tassels and safety washers from the old string.
- Reattach the tassels and safety washers that were saved to the new string.
- Reattach the valance.
Recommendations for Child Safety:
- The lifting cords should be no more than 40% the total length of the blind.
- Consider installing safety washers on each lifting cord.
- Leave each cord hanging separately. Do not tie them together.
- Use cleats to keep cords out of the reach of children.
*** Start here if the string on your blind is completely missing. ***
Step 10 – Thread the new string through the slats.

- Blunt the end of the new string with a lighter to prevent fraying.
- Thread the new string through the slats.
- Weave the lift string back and forth on the sides of the string ladder. Switch sides every three slats to ensure that the slats do not shift during operation.
Step 11 – Remove the bottom rail button and any excess string.

Step 12 – Thread the new cord through the bottom rail.

- Tie a double knot on the string after threading it through the bottom rail.
- Push the string ladder and the knot into the hole on the bottom rail.
- Press the button into the hole to cover the strings.
Step 13 – Repeat steps 10-12 for each lift string being replaced this way.

Step 14 – Remove the blind from the window.

- Use a flathead screwdriver to open the latches on the brackets so the blind can be removed.
- Place the blind on a flat surface
Step 15 – Thread the lift string through the headrail.

- Use a lighter to blunt the tip of the new lift string.
- Thread the string through the cord guide at the bottom of the headrail.
- Bring the cord through the cradle and down the headrail towards the cord lock.
- On some blinds, the drum and tilt rod can be lifted out of the cradle slightly to thread the string easier.
- Be sure to place the drum and tilt rod back into the cradle if it was moved.
- Repeat as necessary until all the new lift strings are at the cord lock.
Step 16 – Thread the lift strings through the cord lock.

- Make sure the strings go between the smooth roller and the textured roller.
Step 17 – Rehang the blind.

- Make sure the latches on the brackets are pushed firmly into place, so the blind will not come out of the brackets.
Step 18 – Test the repair.

- The blind should be raising and lowering evenly.
Step 19 – Finish the repair.

- Cut the remaining lift string to the desired length, and reattach the tassels.
- Attach safety washers to each lift cord approximately 2” from the headrail.
- Reattach the valance.
Recommendations for Child Safety:
- The lifting cords should be no more than 40% the total length of the blind.
- Consider installing safety washers on each lifting cord.
- Leave each cord hanging separately. Do not tie them together.
- Use cleats to keep cords out of the reach of children.


